Making a UTG MP5 silencer by not following the instructions!
This is basically the same version of the Nemisis made but with some slight differences due to Canadian tire having a crappy selection of stuff....so lets start off with the parts you'll need....You won't need a dremel or a drill but you will need elbow grease
Plubming section at RONA or Home Hardware. (stay away from canadian tire since it took me 2 stores to find anything...) Dunno about lansing or Home depot
Item 1) (bottom)
You will need a 3/4” OD PVC pipe that is at least a foot long. However sometimes they sell them for 4-5 dollars for 10 feet so you might have to get them to cut a few foot long lengths for you.
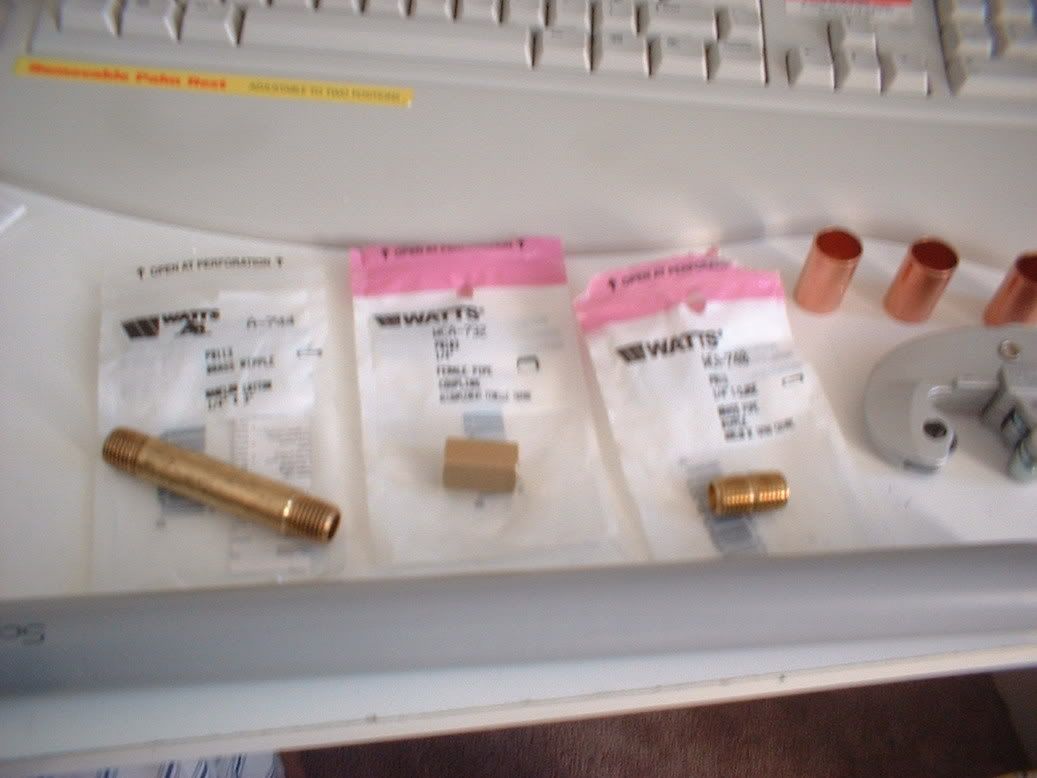
Item 2) (1st item from the left)
1/4” OD X 3”L BRASS NIPPLE/Pipe connector. (you may buy either one or two of these depending on how long you want your silencer to be)
Item 3) (third item from the left in the picture)
LONG SILENCER PEOPLE MAY OMIT THIS ITEM!!!
(long silencer people can omit this one as you will use the tread from one of the 1/4” OD X3” L to thread into the gun)
ONE OF THE FOLLOWING your choice...I'd go for best price as it doesn't make a big difference
1/4” OD X ½ “L
1/4” OD X 1”L
Item 4) (Second item from the left)
FEMALE 1/4” coupling
item 5) (far right)
Standard sized copper pipe connectors which is around 1/2” OD and come in copper. Three of them are in the picture (has to be able to fit inside the pipe but not too snugly as you will use electrical tape to make it snug
item 6)
Black electrical tape
item7)
Pipe cutter (far right)
item8)
flat black spray paint
item9)
sand paper
120/200/1000 grit
item10)
Epoxy/JB weld
item11)
a ruler or you can print one from this site
http://www.vendian.org/mncharity/dir3/paper_rulers/
ARE YOU READY ARE YOU PSYCHED???
I CAN'T HEAR YOU!!!!!
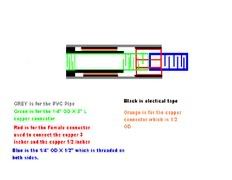
Ok so for starters here's a diagram/cross section of my silencer...
Step 1)
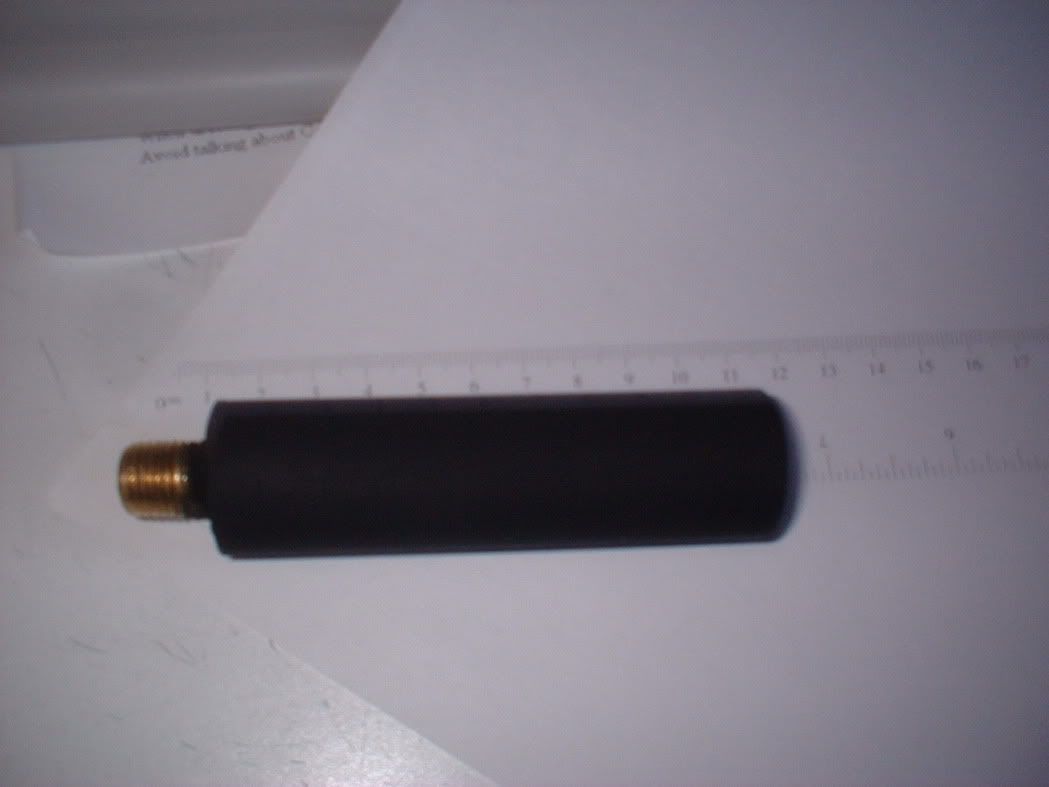
use pipe cutter to cut the pipe to desired length. Approximately 15.5 CM for those who plan to use the standard plan. Those who plan to make the long silencer must lay out the pipe and the attatched pieces side by side to determine where the silencer ends.
Step 2)
after cutting the pipe you will notice that its horriably disfigured...the easy way to fix this is to take your 120 grit sand paper and lay it on the table rough side up and put the end part's jagged area and start sanding it in a circular motion similar to using a mortar and pistol. Do this for both sides until the ends are completely smooth. It helps you later on when you epoxy...make sure both sides stand level.
Step3)
sand down the whole pipe...basically all you have to do is sand with the 120 grit...then progressive finer and finer until you finish off with the 1000 grit. Don't bother sanding the ends yet just the body...
Step4)
start by connecting the pipes until it is similar to my cross section. Remember those who plan to use the longer silencer that your female coupling will be in the middle so you will have to have to have a copper connector on both ends to make it stable.
Step5)
Start wrapping the non threaded ends of the 3” Brass nipple and until you can snugly fit the copper connector in. Do the same thing for the female coupling however there will be no copper connector over this one.
The threaded end that connects to the gun must be left clean or untouched
Step6)
Wrap the copper connectors so that they fit snugly into the PVC pipe
Step7)
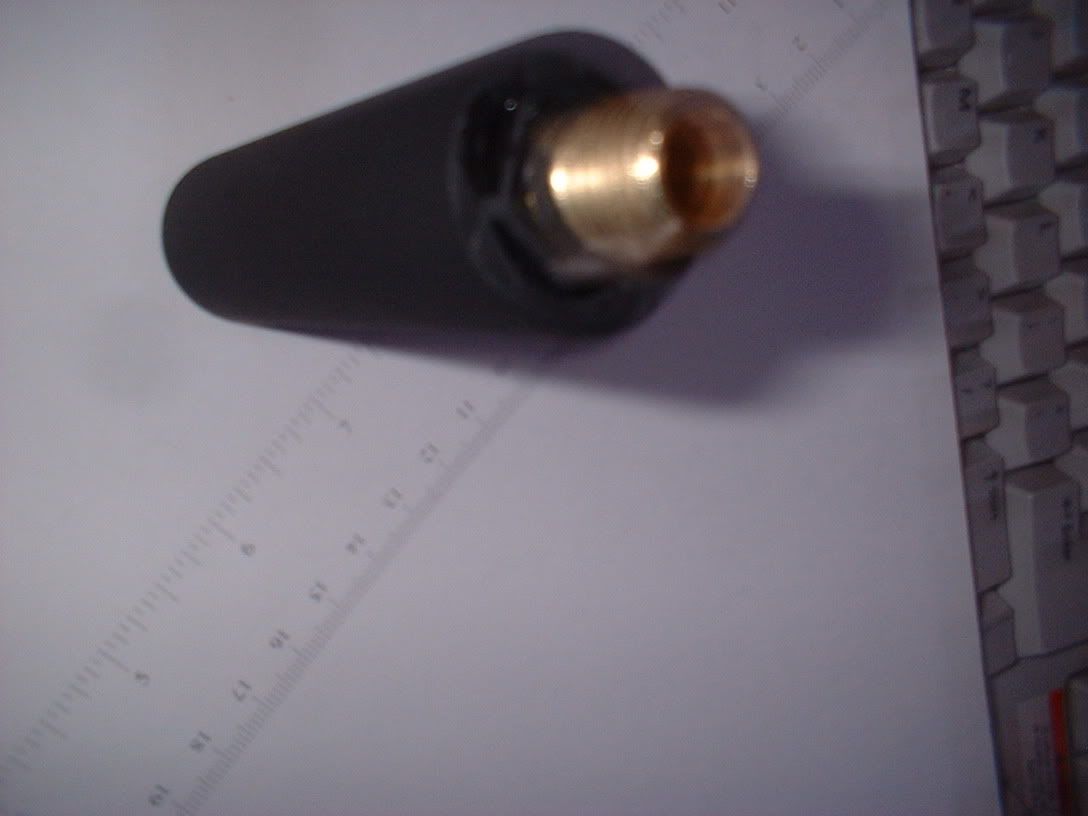
Coat the inside of the whole pipe with expoy and push the internals through until you have the threaded end pertruding at the end and the excess epoxy out the other side.
Your business end of the silencer will look like this to begin with...however it will look normal after you fill out the hole and then dremel it out after it cures it will look really nice. What I did was use paper to plug up the barrel then used a quarter to press it flat so that all the epoxy is even. Afterwards youll will need to sand it down again and dremel out the hole
Step 8) the hardest part...
Wait wait and wait until it all dries i suggest you make sure the barrel is clean and no epoxy is inside as it is a bitch to clean out afterwards...do this buy pushing a pencil with a cotton swab until you reach the other end (DO NOT PULL IT BACK let the pencil go through)
Step9)
Sand down the end using my method or use a dremel to make it look convex/bulged out
Step10)
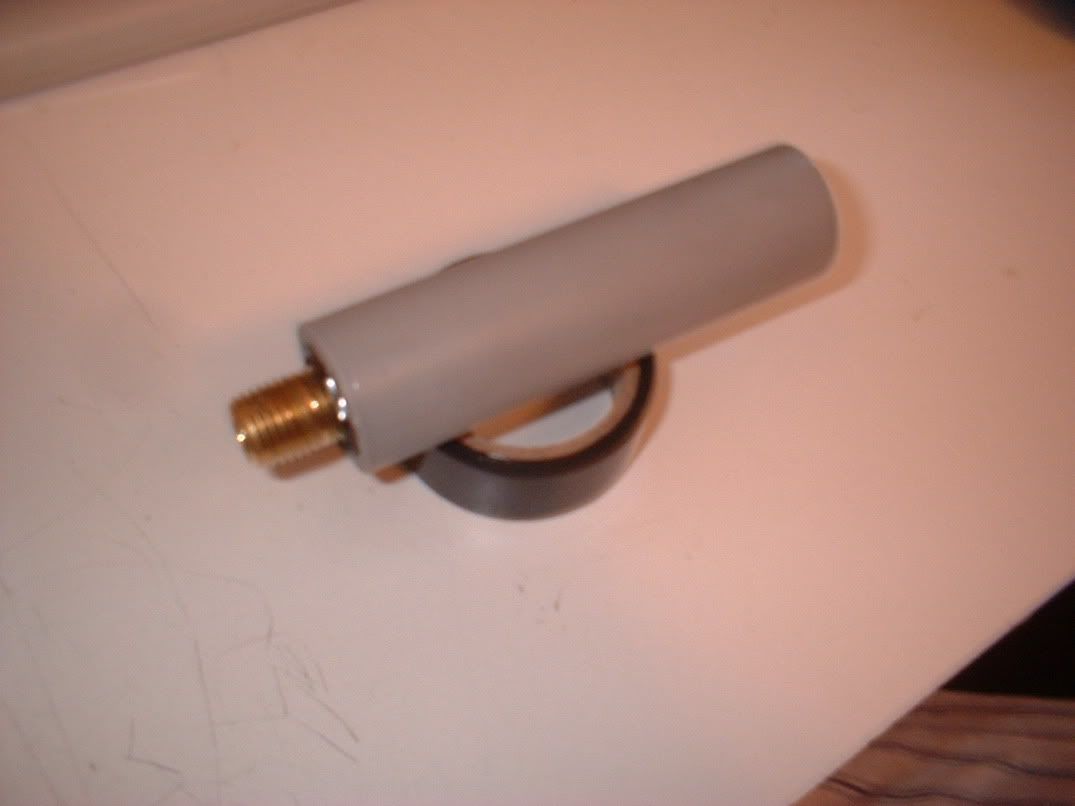
Clean the surface of the pipe using mild soap on a cloth and dry up all the water afterwards
Step11)
paint the silencer but make sure it is elevated from the ground by using some useless crap...
Step 12)
Enjoy the fruit of your labour...
Step 12)
All your base are belong to YANHCHAN